Showing posts with label candy. Show all posts

Saturday, April 4, 2015

Candied Kumquats


I see more and more recipes pop up on places like pinterest that use kumquats. Kumquats, a diminutive citrus fruit with an edible peel, happened to appear at my grocery store recently. I had to get in on the kumquat craze, so I bought some. I didn't necessarily think through the fact that, with Passover starting, my recipe options would be somewhat limited. That's okay, I decided to candy them and figure things out later. After all I love candied citrus! 

Friday, February 6, 2015

Simple Chocolate Truffles


These chocolate truffles are so simple to make. They are a relatively thick ganache, chilled and rolled into balls. The balls are then rolled in various toppings without the traditional double layer of tempered chocolate applied first. This makes them much easier to make. Of course it also makes them significantly more delicate and prone to melting/smushing, but when you really want truffles it can be worth the tradeoff.

The truffles are rolled in various toppings, as I said above. Some were rolled in cacao powder, to give the appearance of a traditional truffle. Others were rolled in cinnamon sugar (these were my friend Sophie's favorite). I also rolled a few in some of the (very strong by now) bourbon sugar from the bourbon balls I made at Christmas. Those are all pictured above. I also made, but did not photograph, some cacao ones with a few flakes of pink Himalayan sea salt on top (perfect color scheme for Valentine's Day, hint hint). They were my favorite, although the bourbon sugar ones were a close second.

Sunday, May 25, 2014

Christmas Candy


Remember I mentioned that I made chocolates for Christmas in 2013? Probably not since it's been ages. But I finally remembered that I promised to tell you about the chocolates I made and miserably failed to uphold said promise, posting about only two of the half dozen candies I made. Sorry. To make up for it, I will finally tell you about the other four. All in this one post. From my least favorite (don't get me wrong I liked them all) to my favorite:

Thursday, February 13, 2014

Mint Hearts (with Recipe)


These mint hearts are a really simple Valentine's Day treat. I made an extra stiff cream cheese mint dough, rolled it out between two sheets of parchment and cut it with a heart shaped aspic cutter (aspic cutters are smaller than most cookie cutters--I usually use mine to cut the centers of linzer cookies).

Thursday, December 26, 2013

Christmas Day


I love Christmas in London! The city is beautiful, everyone seems to celebrate (even Jews like me!), and I have a delicious lunch with my family in Clapham. Jeff is an excellent cook and he made turkey, veg, roasted potatoes, bread sauce, and chestnut stuffing. Yum!

Saturday, May 11, 2013

Belated Birthday Desserts


In addition to the two cakes, I made quite a few desserts for my party:

Toasted coconut brownies
Mini Brooklyn blackout cupcakes with cream cheese frosting
Chocolate, chocolate chip cookies
The brownies were delicious with desiccated coconut giving them a lovely texture. The Brooklyn blackout cupcakes were delicious as usual and the zing of the cream cheese frosting was complemented the deep, dark chocolate cake nicely.

The cookies were surprisingly good. I suppose I shouldn't have been surprised, the recipe was from Nigella Lawson and she really is a domestic goddess, but I love the chocolate chocolate chip cookies from Death by Chocolate. These might actually be better than the latter. The taste was a little sweeter (which I'm not sure is better or worse...it's just different). But the texture was perfect: a little crisp around the edges but still soft and nearly gooey on the inside (without being under baked).

Milk chocolate caramels with Maldon sea salt
Chocolate, peanut butter and oatmeal candies
The caramels and the candies (which are technically no bake cookies, but I think they are more like candies) were both gluten free (as is typical for candies) and were delicious. In fact, the caramels were perfect, which made me really happy because the last time I tried making them they came out yummy but the texture was all wrong and they didn't hold their shape. The cookies/candies, which came out a little crumbly and difficult to shape, ended up richly peanutty and quite sweet with a hint of chocolate and a nice texture from the oats.

Because there were two excellent chocolate cakes, the cupcakes, cookies and brownies didn't get much attention but we sent them home with people as favors and heard good things about them after. Interestingly the candies were popular even with the cakes as everyone's focus. I suppose the small size and the complete lack of similarity to cake made everyone reach for them. Both were well received but the caramels were definitely the star (well the German chocolate cake was the star, but the caramels were the non-cake star). All in all, everything was yummy and there were plenty of leftovers to enjoy after we weren't so stuffed from the amazing food!

Friday, March 8, 2013

Peppermint White Chocolate Fudge


Based off Paula Deen's dummy fudge recipe, this peppermint white chocolate fudge is absurdly easy to make. It also happens to be the smoothest fudge you will ever try. As you may have noticed, I much prefer dark chocolate over white chocolate; but there is something about the sweetness of white chocolate with peppermint that I love. Yum!

Saturday, November 24, 2012

Thanksgiving


As you may have noticed from past years, we are very into Thanksgiving. This year was no exception. In fact we really went above and beyond the usual because we invited our English family for their first Thanksgiving. It was really lovely!


We made the usual turkey with all the trimmings, including mom's incredible stuffing, cranberry sauce (the jelly kind that holds the shape of the can, of course--is there any other?), and gravy. We. Also had two kinds of potatoes: mashed potatoes with a hint of sour cream and sweet potato and yam casserole with mini marshmallows. We also had Brussels sprouts and green beans with lardons and homemade buttermilk biscuits.


For dessert I made, as per usual, a trifle. This year, since my kitchen aid is on the fritz (long story) I decided not to go with my usual pound cake recipe and instead modified the lemon loaf cake we made at the FCI to be a vanilla loaf cake. It wasn't as dense and delicious as a pound cake, but it was pretty darn good (and it was for the inside of a trifle, so it actually may have been better a little lighter.) I layered the cake with my usual chocolate mousse, a vanilla whipped cream/crème fraiche mixture, and sliced strawberries. Delicious!


One of my cousins can't eat gluten, so I also made individual gluten free trifles with gluten free, lemon cornmeal loaf cake, the whipped cream/ crème fraiche mixture, and fresh blueberries. The chocolate mousse was gluten free, but it didn't seem to work with the lemon cornmeal loaf. I didn't taste the whole thing, but the elements were good and it was a hit. By the way, I made the individual portions in martini glasses--a cute trick to make a trifle (gluten free or not) a bit more elegant.


I also made apple tart with a gluten free, walnut shortbread crust and pumpkin seed toffee brittle. The tart came out wonderfully. The toffee came out delicious, but not quite right. I think I mixed it a bit too much so it started to cool and turn opaque before I poured it out. It was absolutely incredible taste wise, so I didn't really mind that it looked slightly wrong.


Overall, all the food was a great success, the night was a ton of fun, and I think we may just have a new family tradition!

Wednesday, November 14, 2012

Almond Joy Fudge~With Recipe


I love fudge but I don't always feel like dealing with the typical candy making exceed sizes like making cooked sugar, so I really love "fake" fudge made with a condensed milk base. I know it isn't fudge in the strictest sense, but it is close enough. I have made this fake fudge before, but this is my own recipe (based very loosely on a Nigella Lawson fudge recipe from Nigella Express, I believe.)

Ingredients:
  • 14 oz good dark chocolate, chopped
  • 1 14oz can condensed milk
  • 2 tbsp butter
  • 1 cup shredded unsweetened coconut
  • 3/4 cup slivered blanched almonds
  • Pinch salt
Procedure:
  1. Line a 9x9in pan with foil and lightly butter the foil.
  2. Combine the condensed milk, butter, salt, and chopped chocolate in a saucepan. Put over low heat and warm until the chocolate and butter is melted, stirring occasionally with a rubber spatula.
  3. Promptly but not too vigorously, stir in the coconut and almonds.
  4. Pour into the pan and even out the top.
  5. Allow to set on the counter for at least 30-60 min and then transfer to the refrigerator to chill for another 2 hours or overnight.
  6. Slice into one inch squares with a sharp knife and store in one layer or in multiple layers with wax paper between them in an airtight container in the fridge.
This fudge should be stored cold but it can be left out for hours, which is convenient if you want to give it as a gift. And fudge makes an excellent gift!


Tuesday, October 9, 2012

Two Chocolate Caramel Candies

During that class I forgot to post about we made two different caramels. The first was a light, chewy-but-soft caramel with slivered almonds mixed in. They remind me a bit of nougatine (though not nearly so brittle). Since it was a chocolate lesson, we dipped the nutty caramel cubes in tempered chocolate, just to coat the bottoms. They were delicious, but a little too sweet for my taste. I prefer a darker and slightly chewer caramel.

Happily, that's exactly what the second caramel was. It was a layer of rich, dark, chewy, sticky, caramely goodness sandwiched between thin layers of bittersweet chocolate. It's a good thing they make us leave some of our candies for events/the restaurant. If I'd kept it all I would have eaten pounds of it! (As it was, I ate quite a bit.)

Sunday, October 7, 2012

Branchlii

This photo came out quite badly,
but you get the point.
Branchii are so called because they look like branches. That's an apt descriptions on of the looappearence of these candies, but not at all representative of their taste. They are far too delicious for their name. Basically, they are firm gianduja chocolate ganache piped into rods, allowed to harden, and then rolled in tempered chocolate and cacao nibs. They are akin to an elongated hazenut truffle, yum!

Saturday, October 6, 2012

Cherry Cordials

At least they look pretty!
Ages ago, when I was still in culinary school (okay, so maybe not ages ago, but it's been a while) we made a bunch of chocolates in one lesson and I forgot to post them. Oops! Anyway, here is the first of the four candies:

Cherry cordials. Hmm. First let me say these are not easy to make. They require the same patience and skill as any of the chocolate ganache filled bonbons since they have the same outer shell. However the filling is sticky and runny and very difficult to work with. You also have to wait a week or two before you eat them to let the liquid center fully disolve the cloudy fondant. Now is when I would usually say that they are worth the trouble and the wait; well they aren't. I don't like cherry cordials. These are some of the best I've had, but I've only had a few and I haven't really liked any of them. I'm not a huge fan of cherry liqueur, candied cherries (I do love the fresh ones), or very sugary sweets--you can see why I wouldn't like these. Ah well, at least it was one thing I didn't eat, I gained enough weight over the course of the 9 month program without these!

Monday, July 9, 2012

Tempering Chocolate

Tempering chocolate is an intimidating procedure, but once you get the hang of it, it isn't bad at all. I spent the entire first chocolate unit and half of the second unit struggling to temper chocolate--it was stressful and difficult. Happily, at some point it just clicked and by the time we got to the last plated dessert unit I actually volunteered to make decorations that used tempered chocolate.

Basically, tempering chocolate is a process of heating, cooling, and agitating chocolate over a period of time. The reason to do this is to encourage the cocoa butter to crystalize in a certain way. When a liquid solidifies it crystalizes (think of water forming ice crystals); cocoa butter is no different. Certain types of cocoa butter crystals (beta crystals) are more stable than others. If you have a more stable crystal the chocolate will have a nicer appearance and texture. By melting the chocolate fully--by heating it to a maximum of 122*F for dark chocolate--you melt out all types of crystals. Then by lowering the temperature (to the holding range of 86-90*F for dark chocolate) in a controlled manner you encourage the formation of beta crystals. There are three main methods of lowering the temperature--tabling, seeding, and using an ice bath. Each method has its supporters. I prefer seeding, but in a pinch I'll use an ice bath. Tabling is too messy in my opinion and is seldom used, however it is the classic method for tempering so it bears mentioning. I will discuss each of these three methods in subsequent posts. Here, I will discuss some basics you will need to know for all three.

First, you must always remember that water is the enemy of chocolate! It will cause chocolate to seize and become too thick to work with. It will also cause unsightly sugar bloom. If your chocolate has sugar bloom you cannot temper it. The best thing you can do with chocolate that has been exposed to water is make brownies or hot chocolate or otherwise use it in a baked good.

Second, it is useful to know about the two types of bloom and how to identify them. They are fat bloom and the aforementioned sugar bloom. Fat bloom comes from improperly tempered chocolate. When the chocolate is not properly mixed and agitated, streaks of cocoa butter can (in essence) separate from the cocoa solids forming swirls and streaks of pale cocoa butter in your hardened chocolate. That's okay, it just means you have to re-temper the chocolate and try again. Sugar bloom, as I mentioned, is a sign of water damage and means you can't re-temper the chocolate. It is easily distinguished from fat bloom; rather than looking like streaks they look like white patches and often appear to be tiny rings (most likely left behind by evaporated water droplets). When in doubt, just use the chocolate for baking and not tempering. There is nothing more frustrating than trying to temper a batch of chocolate only to realize that it just won't go no matter how hard you work at it.

Third, the most important thing you can have when you learn to temper chocolate is a well-calibrated infrared thermometer. A no-contact thermometer is key to checking the temperature because you don't have to worry about contaminating the chocolate or having the chocolate harden on the probe making the readings come out wrong. It is important that it's well-calibrated since the holding range is only a small range of four degrees Fahrenheit.

Fourth, you will also need a clean and dry rubber spatula, a double boiler (or a bowl over a pot of water), dry towels or a pot holder or two (to rest the bowl on in order to insulate it and slow the cooling once you are in the holding range or to keep it from over-heating if you have the next item), and, if you are lucky enough to have it, a warm surface (such as a griddle placed over a pilot light) to keep the chocolate warm and, therefore, in the holding range indefinitely.

Fifth, you may hear people say that you can only temper couverture chocolate. (In case you were wondering, couverture chocolate has extra cocoa butter which makes it more fluid when it is melted and, if tempered properly, harder when it's solid.) That is not true; you can temper any type of chocolate you want. You can temper a Hersey's bar if you have the desire. The reason you typically use couvature chocolate for tempering is that most of the times you use chocolate that is in temper you want to be using couvature chocolate. The reason is simple: because couverture chocolate is more fluid it is ideal for covering candies/truffles/etc and pouring for showpieces and these uses require tempered chocolate. For both uses the appearance of the chocolate is an important part of the final product, therefore you want the chocolate to be in temper (since, as discussed above, tempered chocolate is prettier than untempered chocolate). Also, it hardens harder so it gives candies a nicer snap and showpieces more strength.

I think that's about it. Stay tuned for how to do each of the three main tempering methods.

Thursday, June 21, 2012

Graduation, con't

Sheets and sheets of food...and this was nowhere near all of it.
Oops, I almost forgot to tell you about the food at graduation. Well, actually it's the food we baked for our final exam. I think it is slightly cheeky of them to make us cater our own graduation--we actually have to come in early to heat up and plate all the food. That said, it makes sense, we made a ton of food for our final and it was excellent! All our chocolates (peanut butter nougat and assorted bonbons), our viennoiserie (croissants, danish, and brioche rolls), petits fours (palmiers, macarons, bourbon pecan cookies, and pate de fruits), tarts (linzer tarts and jalousies), and cakes (genoise, lemon chiffon, and chocolate). Unfortunately the lemon curd tartlets and everything made with choux got too soggy in the refrigerator over the weekend.

You see that whole cake behind the tray?
That's my cake!
We had so much food that my cake ended up being used as decoration. On one hand, bummer I wanted to eat it; on the other, very cool that it was nice enough to be decorative!

Sunday, June 17, 2012

Final Exam, the Judging

The judging room.
As I mentioned before, the final exam is judged by guest judges. We had five judges come in. Each judge get randomly assigned 4-5 students--they don't know our names until after they judge us. Once they are done evaluating our food and our showpieces, we meet them and they tell us what they think.

My judge was Zac Young! 
I was the fifth person in my group to get judged and the wait to be called in was the longest 20 minutes of my life. Finally, they called me in. My judge was Zac Young--a former contestant on Top Chef Just Desserts and one of the hosts of Unique Sweets (it's on the Cooking Channel, check it out.) I was really happy to have Zac Young judging me because I really do enjoy watching him on Unique Sweets, because he seems nice on the show, and because I'm considering a career in food writing/food media.

My plate for the judge:
 (clockwise from top) a mini lemon chiffon cake, a cherry danish,
a piece of peanut butter nougat, and a lemon curd barquette.
First, he judged my plate. The plate had one of each of the four things we had to make. He said my danish was delicious and baked perfectly. Apparently many people underbake their viennoiserie--I however am "not afraid of the oven." He said my lemon curd barquette was excellent--both the curd and the shell. I'm very happy he liked the shell because I spent a decent amount of time getting them perfectly even; something that is especially difficult when they are so petit. My nougat, unfortunately, was grainy. I knew he would say that, though, so I was prepared for it. He did say that the even shape of the pieces and the smoothness of the coating made it look like they had been made by machine! He only had one complaint about the cake--he wasn't sure what was going on with the rosemary. I explained that it was supposed to match the woodland look of the piece and that it was supposed to be thyme. He got the woodsy-ness of the green herb but was still hesitant to agree with it on a cake. At which point I explained that I like the flavor of thyme with lemon--I would have infused the lemon curd filling with thyme if I'd been allowed to change flavors.

My showpiece: I know I've posted this picture already,
but I want you to have the visual while you read about the judging.
Next he moved to my showpiece. He really liked the overall look. He complimented my use of different materials. I was worried he wouldn't like the lack of sugar work, but he actually liked that I'd had the foresight not to use a material that would be so affected by the weather (summer in NYC is humid and humidity ruins sugar). His one criticism was that my piece could have used more height. I completely agree; it was a bit diminutive. Still, he said my work was clean and well executed and that the height thing is an aesthetic issue not a technique issue and he is judging on technique rather than aesthetic. He also did point out that my basketweave on the small cake was cleaner and nicer than the basketweave on the large cake--I knew that. I used an easier, quicker technique to do the large cake because, well, it was large and the intricate method was already driving me nuts from having done the small cake.

Overall, he had good input and completely fair critiques. He was kind and constructive. I'm happy with my showpiece, I'm happy with my food, and I'm happy with the judging. It was a good last class. I'm going to miss school, but at least I ended on a high note!

Saturday, June 16, 2012

Final Exam, the Showpiece and the Food

My Final Exam Showpiece
These last five classes have been the most intense classes of the course, but they were worth it! I am really happy with my showpiece and the food I presented. By the way, I know I mentioned earlier that class theme was "my imagination" and my showpiece theme was "Pure Imagination"--I was planning on a sort-of homage to Willy Wonka and the Chocolate Factory.  As I started making the piece, I quickly realized that this is less Willy Wonka and more woodland--so I'm going with that!

My showpiece before I put the food on.
One of the most nerve wracking parts of the final exam is transporting the showpiece; we have to carry it down a relatively long hallway. Luckily we don't have to put the food on until we've put the showpieces where they will be judged, so we don't have to worry about it moving or falling--we just have to worry about the showpiece itself. I made my piece relatively small and decently light, so it wasn't hard for me to carry. I glued everything down with either isomalt or chocolate, so I didn't have to worry about things sliding/falling/rolling off.

My lemon curd barquettes floating down a chocolate river.
I am very happy with my lemon curd barquettes/tartlets. They came out perfectly, if I do say so myself! Everything from the tart shells to the smooth finish of the lemon curd to the fresh blueberries on top. The chocolate river (which is hard to see in this photo) came out pretty darn well as well.

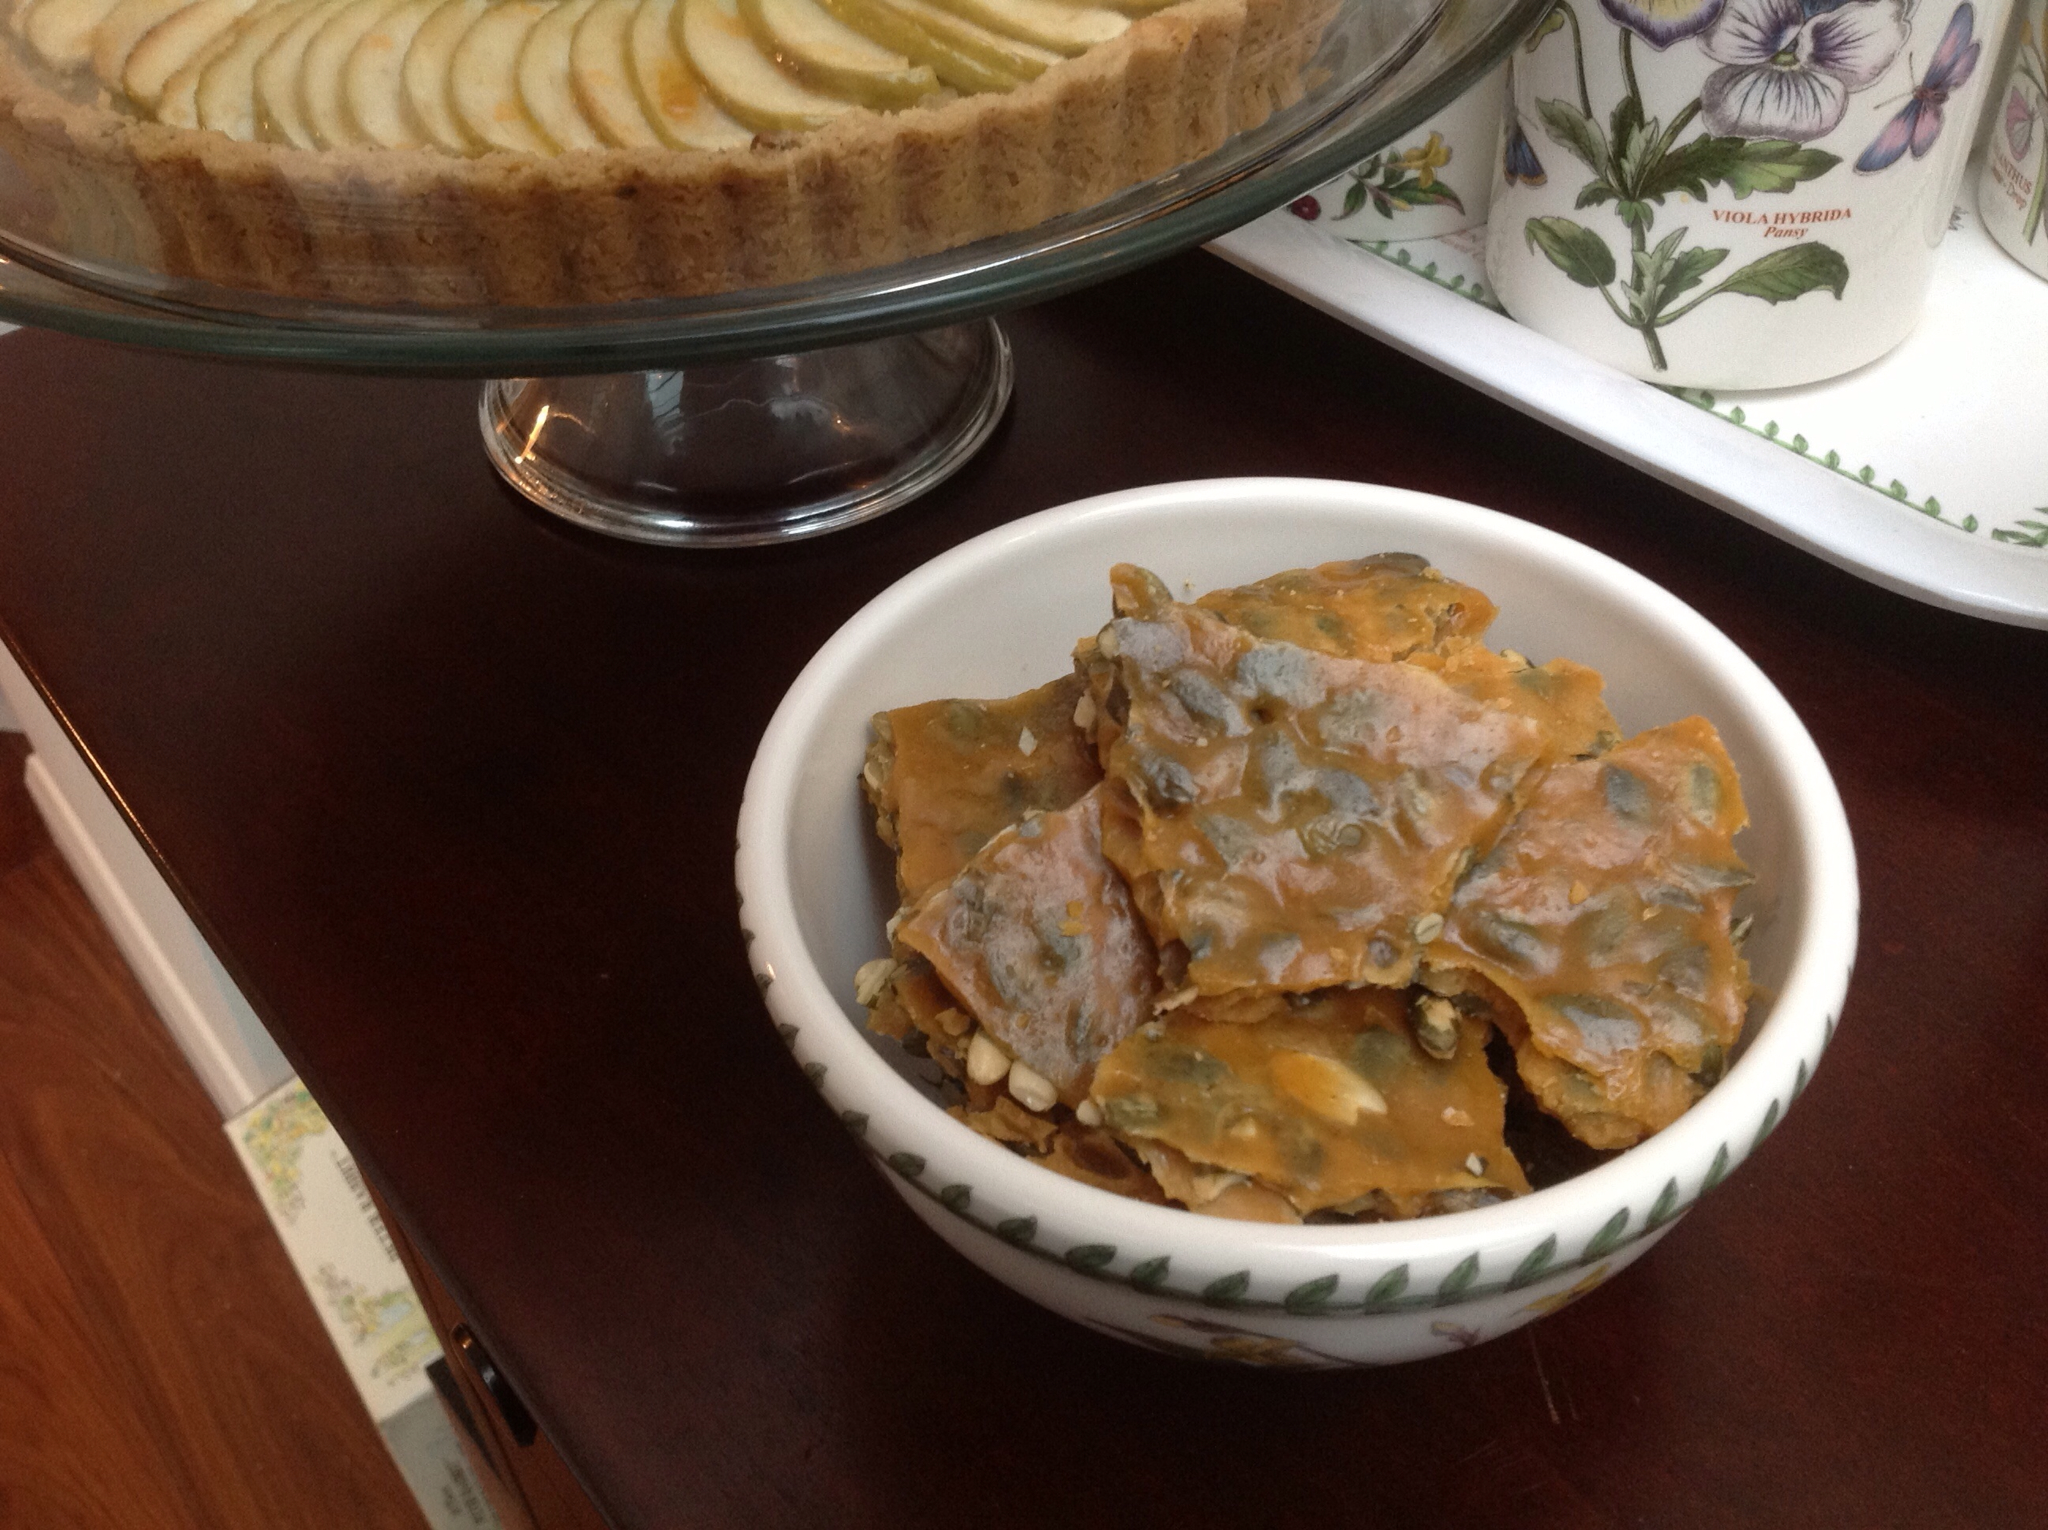
My peanut butter nougat on my stand.
I love how the nougat looks and how it tastes, unfortunately the texture is slightly grainy. Also as much as I like how they look, the chocolate covering, while perfectly tempered, was not quite as perfect on the bottom edges as I would have liked. At least they were very evenly sized and coated.

My cakes, waiting to be put on the showpiece.
My cakes survived being stored--the icing didn't get smushed at all! I just piled some fresh berries on, attached my sugarpaste flowers and stuck in some sprigs of rosemary (I wanted thyme, but rosemary came instead.) As you can see I tried two different types of basket weave. The method I used on the bigger cake is slightly less refined, but much easier than the intricate two tip basket weave method I used on the small cake.

A close up of a sugarpaste flower on top of my cake.
My sugarpaste flowers weren't my finest sugarpaste work, but I do really like them. Plus I think they help tie the cake into the whole showpiece.

My nougat on their stand and more sugarpaste flowers.
As you can see, the flowers act as a sort of tie-in as they are all over the piece. I really like my candy and cake stands (even if this one is ever so slightly slanted...oops!) They give height to the piece and integrate the food well.


As you can see, I made meringue mushrooms. I used the technique we learned in class of piping vacherin meringue stems and caps, sticking the pointy end of the stem into a hole carved into the underside of the cap, and dusting with cocoa powder. However I added another element to take it to the next level. I dipped the under side of the caps in tempered dark chocolate, let it harden, and then dipped them into tempered white chocolate. At that point I let the white chocolate set until just about the cutting point (ever so slightly before it, actually) and scored it with a tooth pick so that lines of dark chocolate emanating from a central point showed through--like the gills on the underside of a mushroom cap. You could barely see this detail once I attached the mushrooms to the showpiece, but it was there and demonstrated an attention to detail that I think was pretty impressive.

My pastillage candy canes.
I am really happy with my pastillage candy canes. They came out just how I wanted them to! I also really liked my chocolate spheres. I've never attempted to make chocolate spheres before. They aren't easy. You have to make half spheres, which is rather like making a bonbon shell except instead of filling them, you unmold them hollow and stick them together with tempered chocolate. I painted them with more tempered chocolate so that you couldn't see the line where they were glued together or any smudges from where I was holding the two halves when I stuck them together. After all that work they looked pretty much perfect. Unfortunately, they ended up slightly hidden on my showpiece, but you can see one sticking out from behind the candy canes in the photo above.

Nine months of classes, five days of intense work, and it all
comes down to what the judge thinks of showpiece number 21.
Stay tuned to hear about the judging!

Wednesday, June 13, 2012

Final Exam, Day 4

I know I skipped days two and three, but I didn't have too much to say. I still don't actually, but I feel bad neglecting my blog for so long. I didn't take photos after the first day because, well honestly, I forgot. So sorry, there won't be anything fun to look at until I finish my showpiece on Friday.

Even though things haven't gone exactly to plan, everything has gone pretty well and I'm happy with how much I have to do next class. I've baked and assembled my cakes--I've even done the basket weave decoration on them. All I have to do is pray that they don't get smushed before next class--I packed them incredibly carefully in my own plastic cake carrier, which I then wrapped in plastic wrap. Assuming they survive Thursday, I will just have to top them with some berries and my sugarpaste flowers (which I made today). My nougat is finished. I cut them and dipped them in tempered chocolate; they look delicious. I had more than enough lemon curd left over from filling the cake to use next class for the tarts. Speaking of tarts, my tart shells are made. Happily everyone is making different things and working with different schedules, so there is never any fighting over ovens and my cakes and tart shells baked off perfectly. My danish are shaped, they just need to be filled, baked, and glazed--all of which must be done the last day.

As for my showpiece, I've made the meringue mushroom tops and stems, I just have to put them together. All my pastillage is sanded and (thank goodness) nothing I needed broke. I even got my cake and candy stands "glued" together. My chocolate river, which I poured onto the base last class, looks great and completely covers two of the three cracks I got in my pastillage base. The pastillage base, unfortunately, took forever to dry (I made it the first class) because of the humidity, so it cracked a bit and warped more than a bit. Like I said, two of the three cracks are hidden and I know I can cover the third with decorations. The plywood base I bought and covered in white wrapping paper fits under my pastillage base perfectly and looks really clean.

I'm worried about getting everything done on time--we only have a few hours before the judging starts. At least I know the final products will taste good and--as long as no one jostles my cakes--I know that everything will look good as well.

Thursday, June 7, 2012

Final Exam, Day 1

My pastillage candy canes
The first hour and a half of the first day of the final exam is devoted to the written exam. After that we start our practical exam. I made my peanut butter nougat so that it can dry out enough that I can cut it and cover it. I also rolled out my pastillage base and decorations--there are a lot! I really don't like working with pastillage, but I'm steering clear of sugar because I'm worried it'll crystalize given the humidity and rain in the forecast. I'm a bit annoyed with my nougat, it's ever so slightly grainy--it tastes great though so I guess I'll have to be okay with it.

Today actually went pretty well. I had an extra half hour because I finished the written section early, so I had time to make the pate sucree for my tartlets (I'd been planing to do it next class.)

I think today was a pretty good start to the final exam and I hope the rest of the exam goes this well.
My peanut butter nougat 

Saturday, May 26, 2012

Final Exam, The Assignment

Yikes the final exam is going to be hard! We have to make two cakes or tarts (one 6in and one mini version), 24 chocolates, 24 petits fours, and 24 pieces of viennoiserie. We don't get to choose what we make, instead we are randomly assigned the four recipes we will make. Our final grade is the average of our grade on the written exam, the grade our chef gives us on how we are working during the final exam classes, and the grade awarded by the guest judges who evaluate our exam. The guest judges are real chefs from outside the school; they evaluate us on the taste of our baked goods and on our final showpiece.

I have to make a 6in and a 3in lemon chiffon cake with lemon curd filling and basket-weave buttercream. I also have to make two dozen cherry danish, two dozen mini lemon curd tartlets, and two dozen pieces of chocolate covered peanut butter nougat.

I'm happy about the tartlets, I'm really good at making them. I'm happy with the nougat because it's definitely easier than bonbons and it's really delicious! I'm not thrilled about the danish, because they require a lot of last minute work (as do the tartlets), but they are fine. I like the lemon chiffon cake and it's not too hard to make. I can use the same filling for the cake and the tartlets, so that's not too bad. The real problem with this set of items is that I have to do basket-weave icing on both cakes, which is difficult and time consuming and should be done the last day because it can't be touched up if it get smudged when it is stored. I may do it the second to last day and just store them really, really carefully. Hopefully that'll be okay.

We also have to make a showpiece to display our large cake and half of the chocolates and petits fours. Our theme is "my imagination". Even though it's very open ended, I'm not sure I'm thrilled with it; I'd actually prefer a little guidance. I'm leaning towards something related to Willy Wonka and the Chocolate Factory because every time I think about the theme I start humming the tune of "Pure Imagination," the song that Gene Wilder sings when he welcomes everyone to the chocolate factory and shows them the room with the chocolate waterfall.

In the interim, we have our wedding cake project (I'll tell you more about that soon). We started it yesterday and finish on June 4th then we start our final the next class...have I mentioned yikes!

Update: Read about my final exam here.

Thursday, March 22, 2012

Homemade Marshmallows and Rocky Road

Homemade coffee marshmallows
I'm not a huge fan of homemade marshmallows and unfortunately these were not an exception. I just find them a little to wiggly and slightly damp. Still, it was cool to make marshmallows and the coffee flavor was nice.

These rocky road candies came out a little
unattractive because the tempered chocolate
was a bit too cool so it got lumpy. Ah well,
it didn't change the taste.
We used the marshmallows in our rocky road candies. As it turns out, adding candied nuts and chocolate to the marshmallows makes them much nicer.